 |
John Uftring (@chargepositif) |

(Note: This is a repost of the same article I posted 2 weeks ago on the Laser Master Academy web site in the Diode forum)
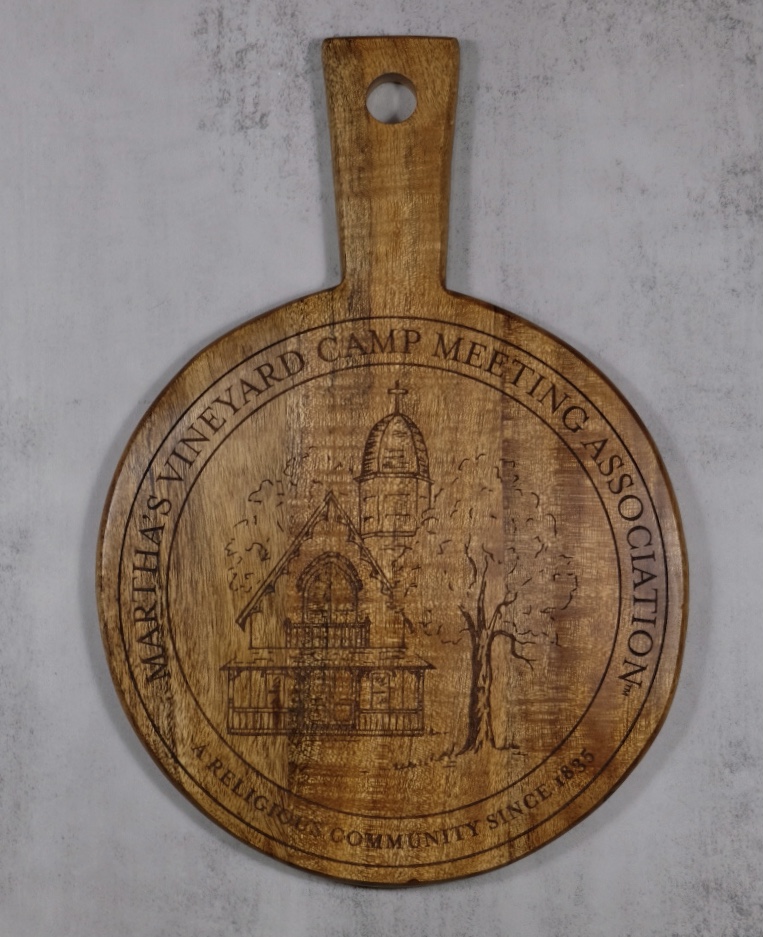
Acacia Wood cutting board engraved on an Ortur Laser Master 3 running a LU2-10A 10 Watt laser module, controlled using LightBurn. The original JPEG image was imported, traced, and cleaned up using Adobe Illustrator before being saved in Illustrator 8 format so that LightBurn could easily import the artwork.
The engraving took approximately 90 minutes to run. Post-engrave the image was brushed out and wiped down with a microfiber towel being careful not to leave any bits of the towel behind. After the wipe down the engraved surface was coated with a thick, but not puddling, coat of Caron & Doucet Cutting Board & Butcher Block Conditioning Oil (purchased on Amazon) and allowed to soak in/dry for about 12 hours. Special care was taken to ensure that the conditioning oil filled in all the engraved areas. Once the oil was dry a coat of Caron & Doucet Wood Finishing Wax was rubbed on and allowed to dry overnight before carefully being buffed with a clean microfiber towel.
The settings I used for this project were:
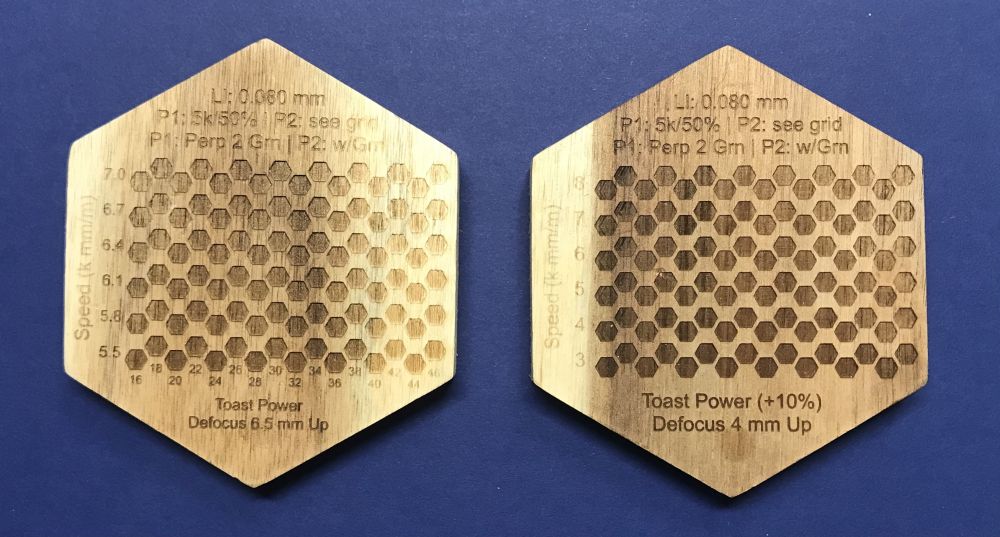
The above settings were determined after running several tests on some Acacia wood coasters.

Decoding some of the notes I engraved on the coasters:
I learned that, with Acacia, running a second pass was a waste of time. The second pass did nothing unless it was 95% power or higher, at which point it turned the wood to charcoal. There was no slow approach to charcoal. It was either charcoal, or not. Charcoal could be achieved with a single pass at 95% power or higher.
The lighter/darker engraving had more to do with the color of the wood than the power output of the laser. The power level really determined the depth of the engraving. I was satisfied with the depth of engraving at 50% power from my LU2-10A.
Other notes: The top photo was taken with a Fujifilm X-T20 camera (now discontinued) using a Fujinon XC 16-50mm F3.5-5.6 OIS II lens. The camera was mounted on a hand-built overhead frame based on plans from Modern Builds DIY Overhead Camera Rig and the accompanying build video on YouTube. The frame is sitting on a 48" x 48" plywood and 2"x4" framing lumber table that is supported on two folding adjustable height metal sawhorses. The lighting was provided by three 5000K LED lights in simple cheap reflective fixtures clamped to the overhead gantry. The concrete looking flat background was purchased from Amazon (not an affiliate link). The LED bulbs could have had a better CRI (Color Rendering Index). The CRI of the bulbs is 80, but a CRI of 90+ would provide a better quality (more realistic) "daylight." I bought what was available at my local big box store(s) at the time.
Links (non-affiliate):
<span class="ql-cursor"></span>
